BONUS CONTENT

 
Bonus Content.png
 

KID-THEMED ROCK PAINTING TEMPLATES E-BOOK

Okay, guys, here is my BIG FREEBIE!

As a bonus for having purchased this Rock Painting Masterclass, you get access to my brand-new Templates Digital Book! It has over 26 pages and 70+ exclusive templates (designed by ME!) that you can use to paint your own awesome rocks!

This Templates E-Book is a $25 value!

The templates are kid-themed but appeal to adults as well. There are detailed instructions on how to use these adorable templates. Use the Trace & Transfer method you’ve already learned to get the image outlines onto your rocks.

Then simply paint the rocks!

OR use this as a coloring book!

To download your Templates E-book, click the book image or the button below:


Story Stones Templates

Here are some additional templates for story stones. Click on each one to pull up a PDF. Then print and follow the directions on the pages!

All rights reserved. No portion of this masterclass may be reproduced, distributed, or transmitted in any form, or by any means, including photocopying, recording, or other electronic or mechanical methods, without prior or express permission from the publisher (owner), except as permitted by U.S. Copyright Law. For permissions, contact LauraKane@alleluiarocks.com.


Leave a Testimonial

If you enjoyed this course and found it to be a great value and would be willing to write a testimonial that we will possibly include on our website, it would be so greatly appreciated!

*By submitting this form, you are authorizing permission for us to post your feedback on our website.


Feedback Welcome!

If you have constructive feedback about anything related to this course, please let me know! I’m happy to hear about anything you feel I should include, or anything that is not working properly. Please leave feedback here.


LESSON 7: Story Stones

This is a set of my nativity story stones

This is a set of my nativity story stones

Story Stones have recently become very popular despite the fact that the concept has been around for centuries. What, exactly, are Story Stones and how are they used? Basically, they are sets of rocks that allow children to tell stories in their own words. They are often used by parents, educators, and therapists as tools to help develop a variety of skills such as language development, communication, and pretend play.

LANGUAGE DEVELOPMENT/SPEECH THERAPY: To encourage the use of new vocabulary and expressive language, therapists and parents will give a child a bag of Story Stones and have him pull out a stone one at a time. The child is encouraged to describe what he sees on the rocks, and to tell a story about them. The facilitator acts as a passive listener, but interjects more advanced vocabulary when it makes sense to do so. This method is fun for children and can be used by parents, educators, and therapists.

PRETEND PLAY: When we were children, most of us never gave “pretend play” any special consideration. We were constantly making up stories and games, pretending to be superheroes or princess, inventing elaborate imaginary worlds to keep ourselves entertained. My sister and I played “Little House on the Prairie” often, and I even had an invisible friend.  He was a ghost named George.  However, there are many children with disabilities who have trouble with pretend play. Story Stones can be a fun way to develop pretend play. Parents and teachers can guide a child through a made-up story using the stones. They start the story, then prompt the child to finish an idea or a sentence.

MEMORY/RECALL: Story Stones are also used as a memory game. The stones can be turned face-down while the child is watching. Then the child is prompted with a question such as “Can you remember where the frog is?” Story Stones can also be used with adults who experience memory impairments. They can look at a stone and talk about any memory the image brings forth.

SENSORY & OCCUPATIONAL THERAPY: Smooth, little stones are a joy to handle. They just feel great in your hand. Children (and adults) with sensory issues might enjoy handling the stones. They also help develop fine motor skills and dexterity.

JUST FOR FUN! Children will enjoy Story Stones in a variety of ways.  Mostly, though, they are simply fun. These sets make great stocking stuffers, birthday gifts, and Christmas gifts.


There are so many possible ideas for Story Stone Sets. They don’t have to be nursery rhymes or songs. They can be based on a theme or topic such as: camping, outer space, dinosaurs, cars, numbers, alphabet, fairy tales, and so much more! Here are some photos of my own Story Stones that have been a huge success in my shop:

 
story 1.png
 
 
story 2.png
 
 
story 3.png
 

Now that you are familiar with the variety of uses for Story Stones, let’s create our own sets!


PROJECT 1: Story Starters

 
pocket7.jpg
 

We will be creating a set of 10 stones that have fun kid-themed images that spark the imagination! That’s why I call these “story starters.” Each stone is a jumpstart for a new, imaginative story that’s totally driven by the child’s imagination!

Follow the steps below to create your set:

  1. Prep 10 small stones with a base coat and background color of your choice. White or sky blue are always good background colors. If you go too dark, your images will be hard to see.

  2. Go to the BONUS CONTENT section to access my Kid-Themed Templates E-book (this is your big freebie!). Download the Templates book and then print at 75% scale. You may have to play around with this to get the templates in the size you want. Story stones are generally small stones, around 1-3 inches in size, so your templates need to be small enough to fit.

  3. As we have learned earlier, there is another way to get the templates small enough for your stones. Simply snap a photo of an image with your phone and resize it, then take a screen shot (on an iPhone, hold down the home and power button at the same time) to capture the final size!

  4. Pick 10 of your favorite images and use the Trace & Transfer Technique to transfer the images to your stones.

  5. Paint the images in bright, vibrant color. Kids love bright colors!

  6. Once the paint has dried, outline the images in black acrylic paint pen to make them “pop.”

  7. Seal the stones with spray sealant and allow them to dry.

  8. Now put your story starters in a drawstring bag or small box, and let a child pick one at random. Ask him or her to tell you a story about that stone! HAVE FUN!


PROJECT 2: Itsy Bitsy Spider Story Stones


Watch the video above or follow the steps below to create your set of Itsy Bitsy Spider Stones:

  1. Prep 8 small rocks with a light blue background and allow to dry.

  2. Sketch the following images/words on your rocks in pencil, or use the Trace & Transfer Technique on the templates in your Kid-Themed Rock Painting Templates Book (found in the BONUS Content section). The e-book has images for the sun, rain cloud, and spider.

    • spider

    • sun

    • rain cloud

    • rain spout

    • “up”

    • “down”

    • “out”

    • “Itsy Bitsy”

  3. Gather the following supplies: paint, brushes, a dotting tool, a black acrylic paint pen, and a red acrylic paint pen.

  4. Paint the stones using bright colors. Add tiny flowers to the word stones using our dotting tools.

  5. Once all paint is dry, outline the images with the black acrylic paint pen.

  6. Seal your stones, then show a special child how to sing the nursery rhyme using these adorable Story Stones!

 
IMG_2141.jpg


PROJECT 3: Old MacDonald Had A Farm Story Stones

 
Click this image to pull up a pdf. Then print and follow the instructions below.

Click this image to pull up a pdf. Then print and follow the instructions below.


Click on the image above to pull up a PDF Template sheet. Then use the “Trace & Transfer” method (or the freehand drawing method) as outlined in the instructions below:

 
1.png
2.png
 
3.png
4.png
5.png
6.png
7.png
mac.png
 

LESSON 6: Mastering Mandalas

Mandala Rock Art is extremely popular these days. These designs on rocks are intricate, colorful, and simply beautiful. They are also a bit intimidating from an artist’s point of view. However, with a bit of practice you, too, can create gorgeous pieces of Mandala Rock Art!

First, though, we have to answer this question: What, exactly, is a mandala?

Examples of mandala rock art

Examples of mandala rock art

Traditionally, a mandala is a geometric figure representing the inner and outer world of the universe in Hindu and Buddhist symbolism. The word mandala comes from Sanskrit, an ancient Indian language. Literally mandala means “circle.” The circle is seen as a magical form, without beginning and end, just as the universe is believed to have no end (source: “What are Mandalas?”).

The Sanskrit word mandala indicates everything that is round or circular. This is why mandalas are circular geometric patterns. Some people find the drawing and coloring of a mandala as a form of meditation. As they focus on coloring in the patterns of the form, they relax, their mind grows quiet, and they may enter into a spiritual space.

The keys features of mandalas are:

  • the circular shape

  • symmetry

  • balance

  • repeating patterns

Though there is a definite structure according to the “key features” above, mandalas allow lots of room for creativity. You can use every color of the rainbow, or just one color or color scheme. Your designs can vary widely, as long as you begin with a center and work your way around it while maintaining the circular shape.


Project 1: Practicing with Dotting Tools

Though we have used our ball stylus pens (also known as dotting tools) in previous lessons, we only touched the surface of what you can actually do with these handy tools. Before we dive into creating a mandala design on a rock, we want to spend some time practicing with our dotting tools.


Watch the video above and/or follow the steps below:

  1. Find some pieces of scrap paper, preferably thick paper like scrapbooking paper or heavy cardstock. I like to use black paper for my dotting tool practice, since most of my rock mandalas have black backgrounds.

  2. Gather your dotting tools and some white acrylic paint.

  3. Using a large dotting tip, dip the tool into the white paint and place a dot on the paper. Do that again to really “load” the dot with paint.

  4. Now place a series of dots from the main dot outward without reloading the paint. You will see that this forms a line of dots descending in size.

  5. This looks like the center of a dragonfly! Use the same tip to create wings by placing a dot on the paper and dragging it towards the center of the dragonfly. Use this process to place 2 wings on each side of the dragonfly.

  6. Now use a small tip to dot 2 antennae on the dragonfly’s head. You made a dragonfly! Try making a few more.

  7. Watch the video to continue practicing your dotting techniques.

  8. The more you practice, the better your technique. Try different designs until you have the feel of your dotting tools.


Project 2: Painting a Mandala Rock

Now it’s time to paint a mandala rock! Remember, practice makes perfect. You can’t expect a perfect mandala on your first try. Just focus on symmetry, find your inner peace, and relax as you build your mandala.

Watch the video below for step-by-step instructions. Normally I would also type out instructions, but these mandala techniques are best learned while watching.


Additional Practice Mandalas

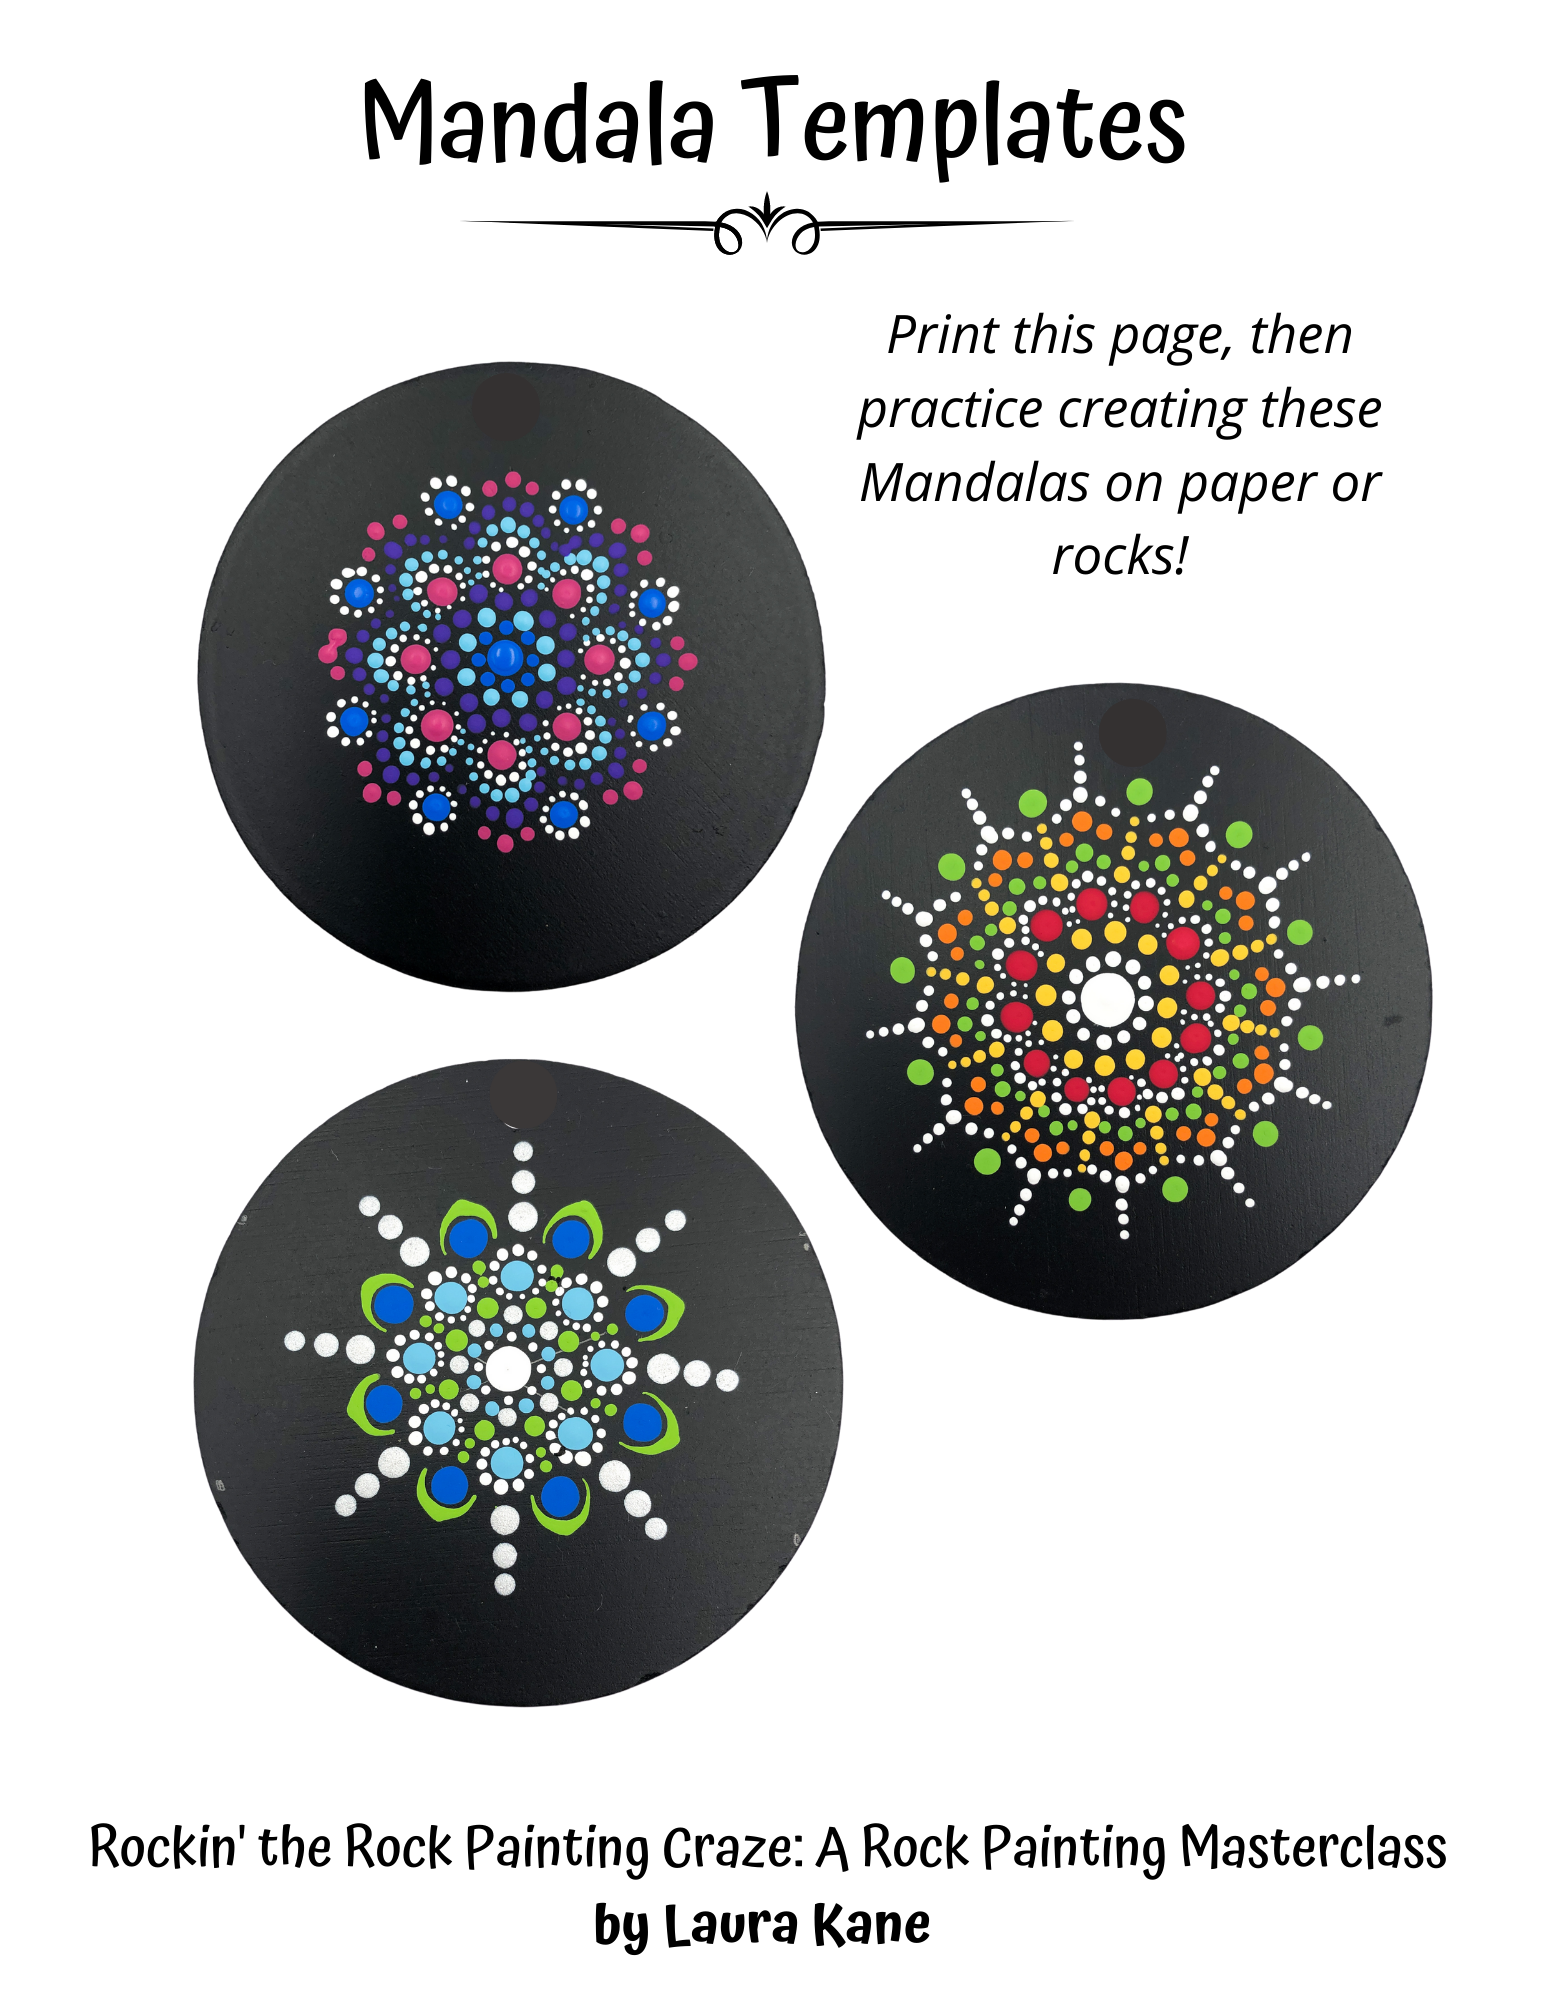
For more practice painting mandalas, print out the following PDF document (click on it to get the document) and use the templates as guides for your artwork. Have fun!


LESSON 5: Dot to Dot

Dot art is a simple concept - you use dots to create a piece of artwork! This technique does not require any amazing painting skills; you just need a little imagination! It’s a great skill to teach children. In this lesson we will be using our Ball Stylus Pens, also known as dotting tools, to complete 3 different projects.


PROJECT 1: Empowerment Pebbles with Daisies

This project is a set of 10 painted pebbles with flowers and words of encouragement and empowerment. They are great for handing out to groups of children and adults alike! Some of my customers keep a set on hand and grab a different rock each morning to carry around throughout the day.


Watch the video above and/or follow the steps below:

  1. Prep 10 pebble-sized rocks (1.5 - 2 inches) with a black background color (TIP: black acrylic paint normally does not require a base coat beneath, so you only need the one coat of black!). Allow the rocks to dry.

  2. Gather different colors of paint for the flowers. I use yellow, orange, red, sky blue, white, and apple green.

  3. Using a ball stylus pen with a medium tip, dip the end in yellow paint and tap a dot onto a rock (in the left-hand corner). This is the center of your daisy. You want to leave room for the petals AND a word or two on the rest of the rock. Continue adding one dot (flower center) onto each rock.

  4. Using the same ball stylus tip, start adding petals to your flowers. To do this, dip the tip into the paint and dot it onto the rock, slightly above the flower center. Drag the tip down towards the central dot to form a teardrop shape. These are the flower petals. (Another option is to simply dot circles for the petals).

  5. Continue adding flower petals to your rocks, changing up the colors. My set has 2 yellow flowers, 2 blue, 2 red, 2 orange, and 2 white.

  6. Now pick a ball stylus pen that has a smaller tip. You will use the green paint to add a stem and leaves to each flower. Dip the tip into the paint and drag the stem of the flower, from bottom to top. This makes the stem larger and the bottom and tapers off at the top. You may need to dip your pen a time or two to have enough paint to make the whole stem.

  7. Then simply dot a leaf on each side of the stem. Continue until all your flowers have stems and leaves.

  8. Now for the final touch on the flowers: use the tiniest ball tip you have to add a circle of tiny dots around the center of your flowers. Place the dots slightly above the central dot, filling in the space between the center and petals of the flowers. This gives your flowers an extra special touch.

  9. Finally, use a white acrylic paint pen to write words of encouragement on your stones! You can use my list of words or come up with your own. Here is my list: laugh, stay calm, be you, believe, dance, sing, smile, play, stay strong, shine.

  10. Now you are ready to seal your rocks. Then… give them to others and see their faces light up!


PROJECT 2: Words of Wisdom Pocket Rocks

In this project, we will paint a set of 10 pocket rocks with daisies and “words of wisdom.”


Watch the video above and/or follow the steps below:

  1. Prep 10 small rocks with a base coat and a background color of your choice. I used bright royal blue as the background, but I have made this set with a lighter sky blue as well. Allow the background to dry completely.

  2. Gather orange, white, and apple green paint, a ball stylus pen with a medium and small tip, and a white (or black) acrylic paint pen.

  3. Begin by dotting the orange centers of the flowers. There are 2 or three daisies on each rock, depending on the size. You want the flowers to be on one side to leave space for the words later. Dip the medium ball stylus end into the orange paint and dot 3 circles onto each rock.

  4. Now it’s time to add the white petals. Dip the medium tip into the white paint, and place dots around the center of each flower to form petals. It’s okay to leave space between the center and the petals, because you will be adding tiny dots in that area later. Continue adding petals around the orange centers of each rock.

  5. To add leaves, dip the small end of the ball stylus into the green paint. Place a dot near a flower, then drag to form a teardrop shape. Continue to add leaves around each flower on all the rocks. Change up the location of the leaves for a more natural look.

  6. Now it’s time to add a finishing touch to the flowers. Using the small ball tip, add a circle of tiny dots around the center of each flower. Place the dots slightly above the central dot, filling in the space between the center and petals of the flower.

  7. Finally, use a white acrylic paint pen (or a black pen if you chose a lighter background) to write words of wisdom on your stones! You can use my list of words or come up with your own. Here is my list: hope, joy, love, kindness, forgiveness, strength, peace, courage, compassion, and faith.

  8. Now you are ready to seal your rocks.


PROJECT 3: Tiny Tree in Autumn Painted Rock

This last project employs Dot Art to create a “Tiny Tree in Autumn.” This is simple enough for children to finish, yet the end product is beautiful!


Watch the video above and/or follow the steps below:

  1. Prep a small rock (sized 2-3 inches) with two coats of white background. Allow to dry completely.

  2. Gather a green paint pen, black paint pen, and 3 colors of paint: yellow, orange, and red. You will also need a ball stylus pen with a medium and small tip.

  3. First, use the green paint pen draw a curved line of grass that will serve as the “ground.”

  4. Next, using the black paint pen, draw a tree trunk and branches of a tree. (If you are not comfortable with this step, practice on a piece of paper first.) Fill in the trunk of the tree using the black pen.

  5. Using both sizes of ball tips, dot yellow, red, and orange circles within the branches of the tree. Use both ball tip sized to add variety to the sizes of your “fall leaves.” Continue adding dots until the branches of the tree are nearly covered.

  6. Lastly, scatter some dots along the grass line at the base of the tree to look like piles of fall leaves.

  7. Congratulations! You have completed another work of Dot Art!

  8. Now you are ready to seal your rock.

LESSON 4: The Trace & Transfer Technique

In this lesson, you will be learning a variety of ways to get an image (from print or online) onto a stone for painting. This is a great option for those of you who are not comfortable with freehand sketching.

A note about copyright

Before we begin, I feel it is my duty as a librarian, and as an artist, to stress the importance of NEVER copying someone else’s work without permission. This is literally against the law… copyright law, to be exact. While the interpretation of copyright law can be fuzzy in many instances, it is simply safest to assume an image is already protected by copyright.

There are some websites that offer free images that can be used for a variety of things. Some are completely free with no strings attached and no attribution necessary (attribution means giving credit, usually at the bottom of a photo, to the owner of the work). Other sites require a line of attribution or the mention of a website. Take a careful look at your source to be sure you comply with the regulations.

Here are some good sites for royalty-free images (click to open these in a new window):

For more information about copyright, go to “Copyright Law of the United States” (warning: it’s NOT fun reading!).

In addition to basic painting supplies, you will need the following:

  • Tracing paper (you can find this at any craft store)

  • Transfer paper (also called graphite paper or carbon paper)

  • A ball stylus pen with a very small tip

  • A pencil and eraser

  • For some projects you will need a cell phone


PROJECT 1: Giraffe and Bumblebee

For this project, we will be tracing two of my own designs, transferring them to rocks using my Trace & Transfer Technique, and then painting them!


Watch the video above and/or follow the steps below:

  1. Prep 2 rocks, about 3 - 3.5” in size, with a base coat and a background color of your choice. (For the giraffe I will use tan background, and for the bumblebee I will use a sky blue background.) Allow to dry completely. If the background coat is even a little damp, the transfer technique will not work!

  2. Click “Trace & Transfer Templates” image (below) to open a PDF of the template sheet. Print the sheet.

  3. Lay a square of tracing paper over the giraffe. Trace the outline of the giraffe using a pencil.

  4. Lay another square of tracing paper over the bumblebee. Trace the outline of the bumblebee using a pencil.

  5. Lay your giraffe tracing over one of your prepped rocks and center it. While holding down one corner of the tracing paper, gently slide a square of transfer paper (graphite paper) underneath the tracing paper, DARK SIDE DOWN. You need the darker side to be facing the surface of the rock.

  6. Holding both sheets of paper securely on the rock, use a small-tipped ball stylus pen to trace over the outline of the giraffe. You will need to press down hard so the image transfers properly. Be careful not to shift the papers while tracing.

  7. Voila! Lift up both papers and you will see that the giraffe outline has been transferred to your rock!

  8. Repeat Step 6 for the bumblebee. You can re-use the same piece of transfer paper a number of times.

  9. NOW… paint the giraffe and the bumblebee! Be sure to re-outline your images in black acrylic paint pen once all paint has dried.

 
Click this image to pull up a PDF for printing.

Click this image to pull up a PDF for printing.


Project 2: Online Image

In this project, you will learn how to transfer an image from an online source to your rock for painting. (Go back to the top of this lesson for links to copyright- and royalty-free stock images.)

** You will need a cell phone for this project. “Why?” you ask. Good question! We will be using our cell phones to capture the online images AND to serve as a light box!

Background story: When I was about 10 years old, my dad made me a light box. I wanted something that would allow me to trace images, and the only way to do that easily is when you have a light source beneath the original image. So my woodworking Dad made me a wooden box with florescent light bulbs inside. The top of the box was a piece of clear, hard acrylic. All I had to do was lay down an image (from a coloring book, for instance), and I could easily trace it by laying another piece of paper on top. The light shone through from below, allowing me to see the outline of the original image!

I have discovered that our cell phones - something we use every day! - are actually PERFECT MINI LIGHT BOXES! They have an internal source of light, making it easy to trace images! Super cool, huh?


Watch the video above and/or follow the steps below:

  1. Prep a medium-sized rock with a base coat and a background color of your choice. Allow to dry completely. If the background coat is even a little damp, the transfer technique will not work!

  2. On your cell phone, pull up an image you want to paint. Use one of the sources in the introduction to this lesson to find a copyright-free image. I like to use pixabay because they have a section of Vector images, which are easy to trace and transfer. Find an image you like and click one of the download options. (Some sites require you to register before you can download.)

  3. Once you have downloaded your image, use your fingers to make it bigger or smaller (according to how it will fit on your rock). Then take a screen shot of the image. (To take a screen shot on an iPhone, press the Home button and the Power button at the same time.)

  4. Save your screen shot to your phone’s Photos.

  5. Pull up the photo. Place a square of tracing paper over the image and carefully trace the outlines using a pencil. You will need to hold the paper at the edges of your phone with your non-dominant hand. If you touch the screen with a finger while tracing, the image will resize, and you want it to stay steady. This take a little practice.

  6. Now you have the outline of your image!

  7. Lay your traced image over your prepped rock and center it. While holding down one corner of the tracing paper, gently slide a square of transfer paper (graphite paper) underneath the tracing paper, DARK SIDE DOWN. You need the darker side to be facing the surface of the rock.

  8. Holding both sheets of paper securely on the rock, use a small-tipped ball stylus pen to trace over the outline of the image. You will need to press down hard so the image transfers properly. Be careful not to shift the papers while tracing.

  9. Voila! Lift up both papers and you will see that the outline of the image has been transferred to your rock!

  10. NOW… paint the image! Be sure to re-outline your image in black acrylic paint pen once all paint has dried.


Resizing Images

Often you will find an image you like in print or online, but it is too large or too small for the rock you want to use. I have a few solutions for this dilemma!

Option 1: If the source is an online document like the template sheet I provided in Project 1 above, use the Scaling feature on your printer to print the size you want. For instance, set the printing Scale at 50% to reduced the image size by 50%. Play around with scaling and sizing until the image is the size you want to transfer.

Option 2: For a printed image, use your cell phone to frame the image in your photo window until it’s the size you want. Snap the photo. Then use the Trace & Transfer technique.

Option 3: If the image source is online, take a screen shot of the image and then, in Photos, simply use your fingers to resize the photo. Then take another screen shot to capture the resized image. Then you are ready for the Trace & Transfer technique.

LESSON 3: Simple Stones for Sharing

 
simple stones.png
 

In this lesson we will be completing four projects that are fairly simple to execute. Despite their apparent simplicity, the end products are powerful! They feature words of encouragement, affirmation, and empowerment and are sure to bring smiles to many faces.


PROJECT 1: Inhale Courage, Exhale Fear & You Are My Sunshine

For this project, we are going to use a black acrylic paint pen to write words of encouragement on the stones we prepped in Lesson 2 with a base coat and a background color. (If you skipped Lesson 2, go back and complete the base coat and background color steps.)

We will be free-handing the following designs on our yellow rocks:

 
inhale%2Bcourage.jpg
sunshine.jpg


Watch the above video and/or follow these steps:

  1. Using a scrap piece of paper, practice drawing the “Inhale Courage” and “Sunshine” designs in pencil. If you practice beforehand, you are less likely to make mistakes on the real thing.

  2. If you feel ready, grab your prepped rocks and a black acrylic paint pet! Begin to draw one of the designs on your rocks.

  3. Change up the font sizes by using lower and upper case lettering.

  4. Trace over the letters, making some lines thicker and darker to give it a more script-like or calligraphy effect. This makes your rock more interesting.

  5. Follow the outer curve of the rock to curve your words. You don’t want them to be in a straight line.

  6. The vine in the “courage” rock is a simple curved line with leaves staggered on each side.

  7. The sun in the “sunshine” rock starts with a swirl in the middle, followed by sun rays that are different lengths.

  8. Be sure to balance your design so that there are no big empty spaces on one side or the other. If you find you have left a lot of space and the design looks unbalanced, add an exclamation point or a tiny heart or some other element to fill in the space.

  9. Once you are done, pat yourself on the back. CONGRATULATIONS! You just finished your first painted rocks!

  10. Your rocks are ready for sealing. See the “Sealing Your Rocks” section below.

The techniques used in these designs can be applied to any kind of text or silhouette design. Play around with new things, and have fun!


PROJECT 2: You Rock!

This project walks you through creating a pocket-sized rock that says… you guessed it!… “you ROCK!” Clever, I know. But I’m sure I’m not the first one to use this pun.


Watch the video above and/or follow the steps below:

  1. If you have not already done so, prep a small rock (around 2 inches in size) with a base coat and a background color of your choice. (I used a tan as my background color; you want a color that will allow black script to show.) Allow the background color to dry completely.

  2. Using a black acrylic paint pen, write “you ROCK!” on the stone. I write the word “you” in lowercase and “rock” in uppercase just for visual effect.

  3. Trace back over some of the lines of the letters for a more calligraphic effect.

  4. Draw a little heart at the bottom of the exclamation point.

  5. If there are any empty spaces that make the rock look off-balance, simply draw another heart in that space!

  6. Using a red acrylic paint pen, fill in the hearts.

  7. You are DONE! Your rocks are ready for sealing. See the “Sealing Your Rocks” section below.


PROJECT 3: Empowerment Pebbles Set

This project is a great one for kids! Your end product is 15 little stones, each featuring a word of empowerment. They can be shared at birthday parties, at school, at church, at hospitals, and basically anywhere!


Watch the video above and/or follow the steps below:

  1. If you have not already done so, prep 15 small stones with a base coat and a background color of your choice. (I used a tan background; you want a color that will allow black script to show.) Allow the background to dry completely.

  2. Using a black acrylic paint pen, write words and/or phrases of empowerment on your stones. You can use any kind of script you want, upper- or lowercase. Here is a list of possible words of Encouragement: courage, friend, believe, trust, beautiful, strong, fearless, brave, faith, hope, love, be you, kindness, you can, you got this, stay strong, you are enough, you are amazing, wisdom, shine, play, sing, laugh, smile, dance, peace… (you get the idea!)

  3. Add a line of dots underneath each word or phrase. This gives the stones a bit of interest and serves as an “anchor” for the word(s).

  4. When you are done with your words or phrases, your rocks are ready for sealing. See the “Sealing Your Rocks” section below.


PROJECT 4: Pocket Pebble Angels

This project is a special one for me. It features my “Alleluia Rocks Angel” that appears on a lot of my designs. These little stones are wonderful for kids and adults alike, and they are small enough to carry in a pocket, purse, or lunch bag! Many of my customers carry bags of these around to hand out as needed in schools, churches, hospitals, and the workplace.


Watch the video above and/or follow the steps below:

  1. This project starts with 10 small rocks or pebbles (sized 1-2 inches) that are painted with TWO COATS of white paint. Allow the coats of paint to dry completely.

  2. Gather the following supplies:

    • blue paint (I use sky blue) - for the dress

    • Skin-colored paint (I used peach, but you can use any skin tone shade you like) - for the face

    • Black paint - for the eyes

    • black paint pen - for the outline

    • red paint pen - for the heart

    • brown paint pen - for the hair

    • Paint tray

    • 2 paint brushes with small tips

    • One ball stylus pen

  3. Using the black paint pen, draw the outline of the angels on your rocks. The design starts with a circle for the head, a triangle with a scalloped edge for the dress, curved lines for the wings, curlieques for the hair, and an oval for the halo.

  4. Draw a little heart beneath one wing of each angel.

  5. Pour a small amount of blue paint into your paint tray. Dip a brush into the paint and fill in the dresses of the angels.

  6. Use the skin-toned paint to fill in the face of the angel.

  7. Use the red paint pen to fill in the hearts.

  8. Use the brown paint pen to fill in the hair.

  9. Once the faces are dry, dip the small end of the ball stylus pen into the black paint. Dot eyes on each angel.

  10. Once all the paint is dry, use the black paint pen to go back over the outline of the angels. This makes the finished product look neater and complete. You can also use this step to cover up any stray paint that may have gone outside of your lines.

  11. Your rocks are ready for sealing. See the “Sealing Your Rocks” section below.


SEALING YOUR ROCKS

It’s important to seal your rocks to protect your precious artwork from scratches, fading, and water damage. See Lesson 1 for more details about the exact sealant I use.

IMPORTANT: You must be sure to find a well-ventilated area to use a spray sealant. The vapors can be harmful. Wear a protective mask over your mouth, nose, and eyes.

Lay your rocks on a flat surface protected with a layer of paper. (I spread shipping paper on an old table and lay my rocks on that.) Spray your rocks with a sweeping motion. Wait 15 minutes and then spray a second coat. If, after the second coat is dry and the rocks are not as glossy as you want, you can spray a third coat. Allow the sealant to dry completely before handling the rocks. Depending on the temperature and humidity, this can take anywhere from a few hours to an entire day.

LESSON 2: Basically Basics

 
Prepping rocks.png
 

WASHING AND DRYING ROCKS

Rocks are naturally dirty. (I feel a bit dumb for even saying that!). Even if they come from a river, they need to be scrubbed before you can paint them.

  • Soak heavily grimed rocks in hot water for several hours. I use a bucket in my utility sink dedicated to that purpose.

  • If your rocks are just a little dusty, they don’t need to be soaked for long.

  • Scrub your rocks using a rough sponge or scrubber.

  • Rinse thoroughly and allow to dry. I lay my wet rocks on an old towel to dry, turning them over once.

  • After the rocks are dry, they are ready for the base coat!


PAINTING THE BASE COAT


Watch the video above, or follow the steps below (hint: click the square in the bottom right corner of the video box to make it full-screen).

Why do I need to paint a base coat on my rock?

Most acrylic paints are not completely opaque on rocks. With just one layer of paint, you can often see through to the rock surface. Painting a base coat keeps you from having to add multiple layers of a background color. A base coat also helps to fill in any cracks or divots in the rock surface, making for a smoother finished product. NOTE: There ARE some paint colors that do not need a base coat. I will be sharing those colors and brands with you as we go along.

White paint as a base coat:

My “go-to” base coat color is white. It helps to make your background color “pop.” It’s also the easiest acrylic paint color to find in bigger jars. You will use white paint the most in your projects.

Gesso as a base coat:

Gesso is a surface preparation compound that can be used as a base coat for rough rocks. It’s slightly gritty and therefore fills in holes and cracks really well. It is painted on with a brush just like acrylics. It goes on white and dries clear, like glue.

STEPS FOR BASE COAT:

NOTE: For Lesson 3, we will need 2 medium-sized rocks, one small rock, and a set of 10-15 pebbles (1-1.5” rocks).

  1. Gather your white paint or your Gesso, a rounded paint brush, a paint tray, and your rock.

  2. “Load” the brush with paint or Gesso and brush evenly across the rock surface in a thin layer.

  3. I like to leave a 1/4-inch “frame” of natural rock surface along the edge. You can do the same or paint the sides of the rock as well.

  4. I don’t paint the backs of my rocks. This is because many of my rocks are used as “Kindness Rocks” for hiding in nature. It is not good for the environment to lay a painted surface down on soil. It’s up to you whether or not to paint the backs of your rocks. Keep in mind that drying time (and total project time) will double to allow for each side to dry. If you choose to paint both sides, you will need to paint a base coat on one side and then allow it to dry before turning it over to paint the other side.

  5. Once you have added paint to your rock’s surface, smooth it out to minimize globs of paint or visible lines.

  6. Place rock in a clean, dust-free area to dry. (Dust that gathers on a base coat will cause unsightly lumps on your finished project).

  7. Complete these steps for all the rocks you will use for Lesson 3.


PAINTING THE BACKGROUND COLOR


Watch the video above and/or follow the steps below:

  1. Gather your rocks that have been prepped with a base coat, a large round paint brush, and a paint tray. Also grab your paint (I use yellow for the larger rocks and tan for the smaller rocks, but you can use any background color you like; we will use these rocks for Lesson 3).

  2. Squeeze some paint into your paint tray.

  3. Load your brush with the paint and start covering the base coat. Carefully move your brush around the edges so that none of the base coat can be seen.

  4. Continue adding paint until the base coat is covered. Smooth over any streaks. It’s normal see some brush strokes in the paint. These will settle down during the drying process.

  5. Continue this process with all of the rocks you prepped earlier.

  6. Set the rocks aside to dry.


Cleaning your tools.png
 

CLEANING UP YOUR TOOLS

Acrylic brushes are almost useless if they aren't cleaned properly, which is why it's important to thoroughly wash your brushes after every use. Neglecting to clean your brushes can ruin them because it leaves bristles hard and crusted together, especially when using fast-drying acrylic paints. Luckily, cleaning acrylic brushes only takes a few minutes of work. Cleaning your brushes allows you to use them over and over and will help lengthen the lifespan of your paintbrushes.

Follow these steps to keep your brushes usable:

  1. Keep a cup of water on your workspace while you are painting rocks.

  2. I generally use a different brush for each new color during a project. When I’m done with one color, I use a paper towel to remove excess paint.

  3. Then I put the brush in the water cup and swirl it around to rinse it. Then I lay the brush flat on a paper towel leave it there until I’m done with the rest of the project colors. Don’t leave the brushes in the cup for a long time, as this can bend the bristles.

  4. When you are done with your project, rinse the brushes in lukewarm water. I have a utility sink in my laundry room where I wash my brushes and paint trays. Luckily, acrylics are water soluble, so if you get paint in the sink it’s easy to clean up with a sponge.

  5. Put a small amount of gentle hand soap or shampoo on the bristles of the paint brush and use your fingers to work the soap into the bristles. Holding the bristles under running lukewarm water, separate the bristles and rinse the paint out of the brush. Be sure to work the soap into the place on the brush where the bristles meet the ring around the stem of the brush. If this area is not cleaned well, the bristles will eventually spread out, harden, and alter the shape of the brush.

  6. If the brush still seems to contain paint, put a small amount of soap in your palm and swirl the brush around the soap in your palm.

  7. Rinse the brush thoroughly in running water, squeezing the tip gently.

  8. Gently squeeze out excess water with an old towel or paper towel.

  9. Lay the brush down horizontally on a towel to dry, making sure the bristles are straight. You don’t want to let them dry vertically because this can bend the bristles.

  10. Clean your paint trays by rinsing under running water. If paint has dried, use a small scrub brush to loosen the paint.

NOTE: If paint has dried on your brushes, they may be headed to the trash can (sadly). You don’t want to let paint dry on the bristles of a brush. You can try soaking the brushes in vinegar to loosen the paint. If this doesn’t work, you will have to discard it.

LESSON 1: Setting Up Shop

 
Supplies, Sources, and Links.png
 

SUPPLIES OVERVIEW

Rock painting, thankfully, is a fairly “cheap” endeavor. Whether you are doing this for fun or for a business, the supplies needed for rock painting are generally not expensive. We can all be thankful for that!

Below is a list of what I always have in my workshop (Note: click on the button further down the page to download a printable checklist!). Following this list are specific sources and links that I have never shared with people before! Yes, you are special!

  • Smooth rocks for painting

  • Acrylic paints in a variety of colors

  • Acrylic paint pens

  • Set of Stylus pens with different tip sizes

  • Paint brushes in a variety of sizes

  • Paint trays

  • Acrylic spray sealant

  • Paper Towels

  • Cups for holding water to rinse paint brushes

ROCK PAINTING SUPPLIES CHECKLIST

 
Rock Painting Checklist.png
 

Click on the button below to get a convenient, printable PDF checklist.


ROCKS

“How many rocks do I need for this course?”

If you complete all of the projects in this masterclass, you will need the following supply of rocks:

  • Large rocks, sized 3-4 inches (approx. 4 rocks)

  • Medium rocks, sized 2-3 inches (approx. 3 rocks)

  • Small stones, sized 1-2 inches (you will need at least 70 of these)

“What rocks should I use for rock painting?”

That’s easy! Just go in your backyard or local park and pick up some rocks! Right???

WRONG!

It’s a mistake to think you can paint on any old rock. Well, correction… you actually can paint on any old rock, but it won’t always be pretty. And we are aiming for pretty, right? You signed up for this course to take the next step from AMATEUR to PRO.

In this case, we DON’T want “any old rock.” We need to be a little choosy. Luckily for you, I have 4 years of trial and error under my belt, and I will share what I’ve learned with you!

When I first started rock painting as a hobby, I would be constantly on the lookout for rocks on the ground wherever I went. My husband recognized my “rock hungry” look. He would keep me in line by saying things like, “No, you can’t pick up that rock from that tree bed in the Target parking lot! That’s illegal!” or “I’m sure the neighbors don’t want to share their pebble flower beds with you!”

Sadly, I do not live near a natural source of rocks (river, lake, beach). I realized fairly quickly that I would need to shell out some money to BUY rocks. Believe me, I did not enjoy this idea. After all, rocks appear in nature all around us; why on earth should I BUY them? I got over that quickly. The gravel shards and craggy pebbles I picked up randomly were not good enough.

CRAFT STORES: I began my quest by looking in craft stores. There are small bags of rocks available at Michael’s and Hobby Lobby, but they are EXPENSIVE and I found that half of them cannot be used to paint on. I ended up having to toss many into my garden.

LANDSCAPE SUPPLY: Next, I tried using rocks meant for landscaping. This worked to a certain extent. I found that Mexican Beach Pebbles (available at Home Depot, Lowe’s, or WalMart) worked well, but here was the problem: I had to purchase these in large bags, and usually was only able to use about a fourth of a bag. The rest were broken or shaped strangely. This was a waste of money since, again, I had to toss most of it into my garden.

ONLINE STORES: I decided to see if my favorite shopping source, Amazon, had any rocks. I thought, “surely not, what about shipping costs?” Well, Amazon DOES have some sources for rocks for painting. However, they are VERY pricey. I see more and more options popping up as the rock painting craze takes flight, but none of them are cheap.

MY SOLUTION? I looked on Etsy. I don’t know why it took me that long; after all, I am an Etsy shop owner as well. Through trial and error, I found a couple of sources. Since then, I have not had to look elsewhere!

These two Etsy shops are my absolute FAVORITE sources for smooth, flat rocks. The owners of these two shops have given me permission to share their links with you. I have been keeping these shops a SECRET when people ask me where I get my great rocks… but now I am sharing them with you! YOU’RE WELCOME.

  • JDSticksandStones (Oswego, NY): the owners of this shop collect smooth rocks from the Great Lakes in their area. These stones vary in size from 1 to 4.5 inches and are extremely smooth. They are perfect for memory rocks, mandalas, paperweights, and other larger designs. Shipments arrive quickly and the rocks are already cleaned; you just need to rinse them off, but no scrubbing required. Their customer service is excellent!

  • PNWCoastalCreations (Port Angeles, WA): These beach rocks from Washington State are flatter and slightly more coarse than the ones from the link above. They are perfect for Story Stones and pocket rocks because of their light weight and thin style. I have also used these to create magnets; since they are flat, it’s easy to attach magnets with crafting glue such as E6000. These rocks arrive in clean condition, and customer service is amazing.

Final Note: If you are lucky enough to live near a source of smooth, flat rocks from a beach, river, or lake, YOU ROCK! Go out a grab some! Then share some with the rest of us. ;-)


PAINTS

I use the following two brands of acrylic paint:

These are links to products in Amazon, but you can also get these in craft stores such as Michaels or Hobby Lobby.

paint.jpg


posca pens.jpg

ACRYLIC PAINT PENS

Acrylic paint pens work really well on rocks. The colors are slightly more vibrant than regular acrylic paint, and they are easy to use. The only drawback is that certain colors require more than one coat or else you will see the rock surface beneath.

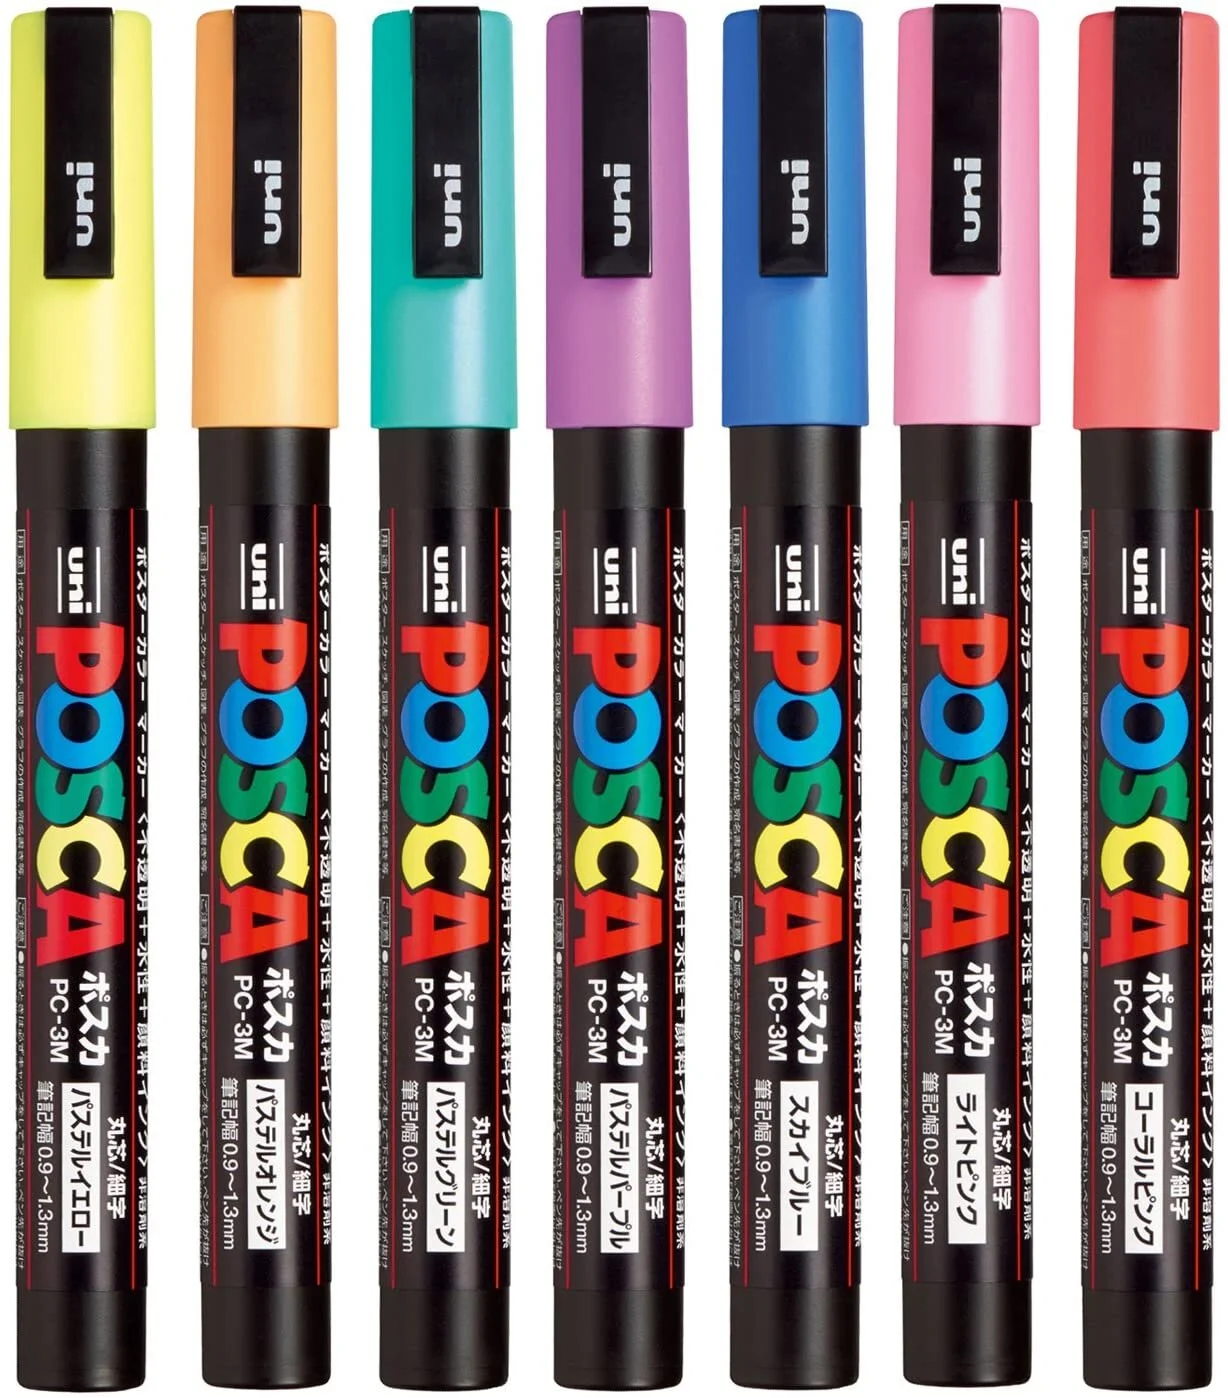
  • Uni-POSCA Paint Marker Pens: My favorite brand of acrylic paint pen. I have tried many, but these are by far the best. They have NO SMELL and have vibrant colors. This is a set of colors, but there are many other colors to choose from. They are sometimes shipped form overseas, so plan your projects ahead of time. Be sure to order the EXTRA FINE tips for detail work. They are not extremely fine but work well for most things. Get the pens with bigger tips to cover larger surface areas.

  • Uni-POSCA Extra Fine Black Marker Pen: This is the pen I use for outlining my designs once I have painted a rock and the paint is dry.

  • FLYMAX Black Acrylic Paint Pen: These fine-tipped pens are also great for final details and outlining.

NOTE: For extra-fine details, acrylic paint pens don’t work very well because the flow of paint is too fast. Instead, use MICRON pens with very fine tips. These tend to dry out quickly so I don’t use them very much. They will smear if you try to seal your work with a brush-on sealant. This is why I recommend a spray sealant.


BALL STYLUS PENS

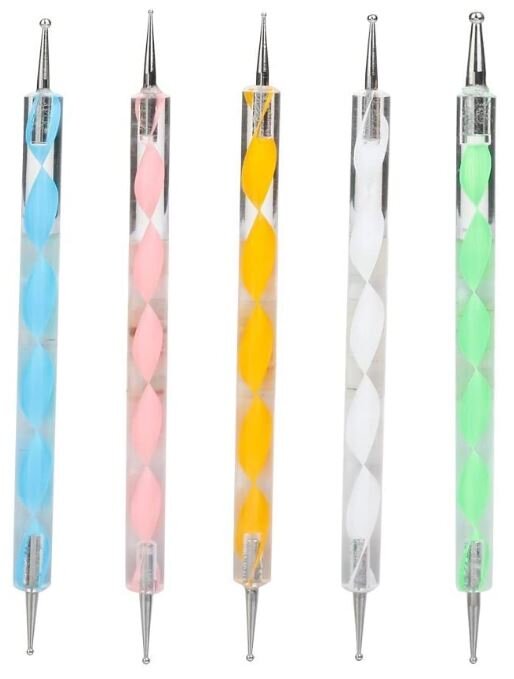
These unique pens are topped with a steel ball on either end. Originally designed as tools for embossing, these handy “pens” have become popular in the rock painting community. They can be used to create evenly-sized dots or successions of dots that ascend or descend in size. In other words, they are perfect for Mandala Art, which we will cover in Lesson 6.

I use ball stylus pens for MORE than Mandalas, though. I use them to embellish my rocks with tiny dots, and I use them for certain designs such as stars, flowers, and more. They are also handy for drawing fine lines, filling in small details with paint, or creating texture.

These usually come in sets, and each pen has two sizes of ball tips (one on each end). I got my set on Amazon.

Ball stylus pens.JPG


PAINT BRUSHES

I don’t spend a lot of money on top-quality paint brushes. We are working solid, non-absorbant canvas (a rock!), so you basically need a set of brushes from fine to thick. For some things you will need a fine-tipped brush that does not hold much paint. For larger surfaces, you will need rounded brushes you can “load” with paint. You can get a variety at craft stores.


SEALANT

You will want to seal your painted rocks with a coating that protects it from scratches and from exposure. Acrylic paints are water-based, which means they can be washed away with water. Think: heavy rainfall on a rock you’ve hidden outside. It’s only a matter of time before the paint begins to wash away. Garden stones and markers absolutely need a water-resistant sealant.

As with many of my supplies, I spent a lot of time (and money!) finding the best sealant for my rocks. Many people will recommend Mod Podge. I do NOT use it! It takes forever to dry and sometimes remains sticky indefinitely. It’s also not waterproof. Others recommend a brush-on sealant. This only works with true acrylic paints. If you used any type of acrylic marker, brushing on a sealant will cause your artwork to smear!

There is nothing worse than created a Painted Rock Masterpiece only to have it ruined by a bad sealant!

I use a SPRAY sealant called DecoArt Americana Acrylic Sealer/Finisher. It comes in a gloss or a matte finish (it’s up to you whether you want your rocks to be glossy or not). This sealer is labeled as a “clear, protective, non-yellowing, waterproof coating which provides permanent protection to all painted finishes.” “Nuff said.

You simply spray several coats on the rocks in a sweeping motion, waiting 15 minutes or so between coats. Easy peasy!

NOTE: You must be sure to find a well-ventilated area to use this spray sealant. The vapors can be harmful. Wear a protective mask over your mouth, nose, and eyes.


EXTRA STUFF

Just a couple more things to mark off your Supply Checklist:

  • Paper towels: You will need these. Like, a lot! Not only for spills but also to wipe the ball stylus pens clean. I use paper towels to dry paint brushes after I rinse them during a painting session.

  • Cups for water: Have an old plastic cup full of water on your workspace while you paint. Swirl your brushes in the cup to rinse, then dry with a paper towel. Or dunk your used brushes in the water and leave them there until you have time to properly clean them.

  • Coffee: Ha! Just kidding. I guess not everyone requires a cappuccino while they are being creative…


Workspace.png
 

WORK AREA SUGGESTIONS

Everyone has their own vision of THE Perfect Workshop. It doesn’t always work out the way we want it to, though. Because, life. Am I right? We make do with what we have, and if an opportunity arises for improvement, we take it!

My workspace is in one half of our master bedroom. Granted, our master bedroom is HUGE so the area was wasted space anyway. I have a work table, a cabinet for shipping supplies, bins with rocks, a bookcase for painted rock storage boxes, and several rolling cabinets for my paints and other supplies.

Regardless of your workshop setup, I have several recommendations:

Lighting: You will want your workspace to be near a natural light source (a window!). Natural sunlight is the best source for painting and for perception of color. You will, of course, need to also add artificial light for those dark days or evenings. Choose halogen lights and incandescent bulbs as these have been proven to illuminate artwork best. I have several lamps on my workspace and move them around as needed to minimize shadows.

Utility Sink: If your workspace can be near a utility sink, that is ideal! My bedroom is next door to the laundry room, which has a utility sink. I use the sink multiple times daily to:

  • soak and scrub rocks

  • wash paint brushes

  • rinse cups and paint trays

Ventilated Space: This is a must. If you plan to use the spray sealant as I have recommended above, you need a ventilated area in which to do so. I have a storage space adjacent to my master bathroom that is open to the outside. This is where I do my sealant spraying. It’s not ideal, but I wear safety goggles and a mask over my mouth and nose. The storage space has a door which I close behind me once I am done spraying. I then turn on several floor fans in the bathroom and open the windows. You can set up a space in your garage, with fans for ventilation. Ideally, we should all have a ventilated Spray booth, but… well, I personally would need to win the lottery first!

 
Extras.png
 

What else do I use frequently for my rock painting business?

This is not a course on marketing and product photography, but I thought I’d share some basic equipment that I use to photograph my rocks and edit them for use on Etsy or my website. None of these are super fancy, but they work for me.

  • CAMERA: You thought I was going to list some fancy, complicated camera here, didn’t you! Ha! No, because I use my handy dandy iPhone to take my product photos!

  • LIGHT BOX: Lighting is key to good product photos. My rocks are difficult to photograph because the are rounded (of course), so there is the shadow issue, and because the sealant I use is glossy, which causes reflections when I photograph them. I purchased this Havox Light box to control the shadows and improve lighting. Before making this purchase, though, check YouTube for “How to Make Your Own Light Box.” There are many ways to make your own! I made my own light box and used it for awhile before investing in this one.

  • PHOTO EDITING APPS: Though the light box helps with lighting, my photos still require touch-ups to adjust exposure, saturation, vibrance, etc. My favorite phone app for photo editing is Lightroom. I also use PicMonkey for some things, and PhotoGrid for collages. (I didn’t include links here because apps are change frequently.)

INTRODUCTION


My Story.png
 

MY STORY

Hi! My name is Laura Kane, and want to take a moment to WELCOME YOU today! I’m so pleased that you have decided to invest some time and money in this Rock Painting Masterclass. My hope is that this will be a wonderful and valuable experience for you.

Now… a little about me…

I am a medical librarian by trade. I’ve been an academic librarian for nearly 28 years (sheesh… I don’t FEEL that old!). I live in South Carolina with my husband and 3 sons. My oldest just graduated from college, my middle son is a senior in high school, and my youngest is 11 years old. I enjoy playing tennis and singing in the church choir, and sometimes I pretend to play the guitar.

Most relevant to you guys, though, is the fact that I am the owner of a shop called Alleluia Rocks. Actually I have two shops by the same name, one on Etsy as well as a standalone website. My shop has an overarching theme of encouragement. On my rocks, I include messages of affirmation, faith, and empowerment. I also specialize in Story Stones for children, which are not only fun but also encourage language development, social skills, and imaginative play.

Alleluia Rocks came into being after my discovery of the joy of rock painting. While I have always enjoyed crafting, painting, and scrapbooking, this medium holds a certain indefinable charm. You take the lowly river rock and elevate it with a bit of acrylic paint, and a piece of art is born!

I blame a coworker for getting me “hooked.” One day, she brought in two rocks she had painted just for fun. They were absolutely beautiful, and I was amazed. I bombarded her with questions and within a week I had begun to paint rocks of my own.

Fast forward three years… and here I am. I never thought in a MILLION years that selling painted rocks would be a successful endeavor. I just thought that opening a rock shop on Etsy would be a fun hobby. My family members were indulgent but secretly scoffed at me. After nearly 2500 sales and putting my son through college with the proceeds (okay, he had a few scholarships), I am convinced. People are actually paying me good money to paint rocks for them! Take THAT, scoffing family members!

Along the way, I have learned many things about entrepreneurship, about marketing, and about running a craft business while working full time and taking care of my family. Mostly, though, I learned MANY THINGS about rock painting. Through trial and error I acquired many skills, techniques, and tricks that, together, have made my work a success.

I get inquiries constantly about the techniques and supplies I use. Since this is my business that I worked HARD for, I never share what I know. I don’t share my supply sources, I don’t share my proprietary techniques, I don’t share my secrets. It would be like handing money to my competitors. I don’t do it… UNTIL NOW!

I’ve realized that I can’t keep painting rocks forever. I CAN, however, pass along what I know so that others can be successful too.

This is why I have developed Rockin’ the Rock Painting Craze. To share my SECRETS with YOU so that you will have the ammunition to create a successful business, or…

TO JUST HAVE FUN!


Rock Painting National Craze.png
 

ROCK PAINTING: The Movement

Fairy early along my rock painting journey, I learned of a movement that was catching fire across the country. It's called the KINDNESS ROCKS PROJECT.  This is an amazing endeavor created by Megan Murphy, a self-proclaimed "Kindness Activist, Women's Empowerment Coach, Meditation Instructor and Creativity Enthusiast." A beach lover and collector of sea glass and beach rocks, Megan one day wrote words of encouragement on a couple of beach stones and dropped them in random spots on her daily walk. A friend found one and said, "If you did drop this rock, it made my day." Grasping onto the catch phrase "Kindness is Contagious," Megan founded the Kindness Rocks Project.

The goal of the project? Simple: to "connect many" and to "inspire and empower others to join us in creating a kinder world."  How is this accomplished? Even simpler: by leaving rocks painted with words of kindness and affirmation in public places for strangers to find.

The movement took off by leaps and bounds. By encouraging people and groups to "leave rocks painted with inspiring messages along the path of life," Megan has drawn thousands of people into her simple plan to make the world a kinder, more caring place.

The success of the project is apparent if you visit her website.  Across the country, Kindness Rocks groups have officially registered to be a part of the movement. There is now an actual database of registered Kindness Rocks Groups!  And the really great thing about this is that this system can help groups connect with one another. The Kindness multiplies!

LET’S FACE IT… rocks are the foundations of our planet. They have been around since the beginning of time. We LIVE on a big rock floating in space. Painting them is not a new craft. Think: caveman drawings! Prehistoric civilizations created pictographs, petroglyphs, and engravings on rocks, all of which seemed to serve religious, social, or economic purposes.

BUT the way we are using rocks TODAY is unique. We are spreading love, kindness, and encouragement through a medium that lasts. We should all be proud to be a part of this movement.


Objectives.png
 

ROCK PAINTING MASTERCLASS OBJECTIVES

You are all here for a reason: to become the best Rock Painters you can be! You might have already tried your hand at rock painting. After all, a common attitude seems to be, “Anyone can do it!” Yes, anyone can paint rocks. BUT… can they do it WELL? Can anyone paint rocks that people will PAY for? I don’t think so. Not without some training, effort, and a bit of skill.

Take a look at this photo. These were some of my very first rock painting creations. I thought they were AWESOME at the time. Well, they ARE awesome in their own unique way, but when I compare these rocks to my current creations, I have to cringe a little. MY TAKEAWAY: There is always room for improvement!

Perhaps you want to open your own online shop, or maybe you want to start selling painted rocks at craft shows. Or it could be that you simply want to paint beautiful rocks to share with friends and family. No matter your endgame, one thing is certain: you will learn a lot, and you will be able to apply what you know to your Rock Painting Vision.

This Masterclass is a self-paced tutorial delivered in text format and and embellished with videos. You can go through the course at your own pace and on your own time. Complete it in as little as a week or as long as a year - whatever works for you! It is divided into Lessons that focus on distinct tasks or designs. It’s best to follow the lessons in order, because each new lesson builds upon the previous one.

An example of some of my very first rock painting creations.  This photo reminds me that there is always room for improvement!

An example of some of my very first rock painting creations. This photo reminds me that there is always room for improvement!

What can you expect from this course?

  • A supply checklist, descriptions of materials, and specific sources for rocks, paints, and more

  • Workspace recommendations

  • Multiple video tutorials demonstrating specific tasks and techniques

  • Step-by-step written instructions on each technique or task

  • Basic, intermediate, and advanced rock painting techniques

  • Instructions on how to transfer an image from any source to a rock for painting

  • How to use dotting tools for dot art

  • Creating Mandalas

  • Painting Story Stones sets

BONUS: You will receive FREE access to my “Kid-themed Rock Painting Templates E-Book” (a $25 value!) that you can use to paint adorable rocks for kids!

 
Let's go.png